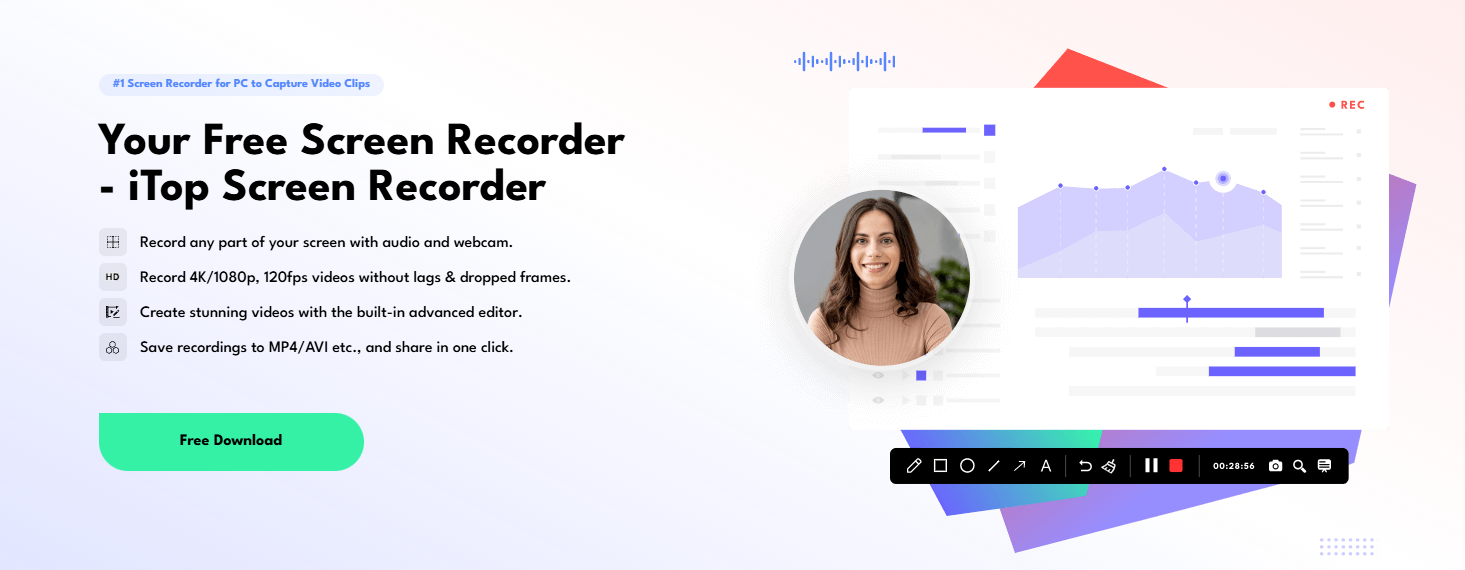
In today’s digital era, screen recording has become an indispensable tool for professionals, educators, gamers, and content creators. Whether creating a tutorial, capturing gameplay, or preparing a presentation, the right screen recording software can make all the difference. That’s where iTop Screen Recorder comes in—a powerful yet intuitive tool designed to produce high-quality recordings on Windows effortlessly.
This article explores the standout features, practical benefits, and versatile use cases of iTop Screen Recorder, revealing why it’s the ultimate solution for all your screen recording needs.
Benefits of Choosing iTop Screen Recorder:
A combination of simple operation with extensive functionality and wide functionality distinguishes iTop Screen Recorder from its competitors. Windows users will find practical reasons to choose iTop Screen Recorder because its most appealing features include:
Stunning HD Recording
The application lets you capture video recordings in top-notch HD for professional results. Users can produce polished results for tutorials, gameplay recordings, and presentation captures to achieve impressive results.
User-Friendly Interface
The user-friendly screen recorder software iTop Screen Recorder caters to users ranging from beginners to those with advanced skills. Users without learning challenges can start recording through the user-friendly interface by clicking once or twice.
Optimized Performance
iTop Screen Recorder delivers an effective and portable solution because it operates without using heavy system resources. This efficient software operates without causing system speed reduction, which enables its use on a wide range of computing equipment.
Main Features of iTop Screen Recorder:
1. Ultra-High-Quality Video Recording
Capture every detail with iTop Screen Recorder’s advanced 4K recording capabilities. Whether creating tutorials, recording gameplay, or saving a webinar, enjoy crystal-clear, professional-grade visuals every time.
2. Lag-Free 4K/1080p Recording at 120fps
Say goodbye to lags and dropped frames. Powered by cutting-edge algorithms, iTop Screen Recorder ensures smooth, seamless performance even at high resolutions like 4K. Perfect for capturing fast-paced action and gameplay with flawless precision.
3. Flexible Recording Options

Choose exactly what you want to record—your full screen, a specific application window, or a custom region. These versatile options make iTop Screen Recorder ideal for everything from YouTube content creation to online meeting recordings.
4. Superior Audio Capture
Record audio with exceptional clarity. Whether system sounds, microphone input, or both, iTop Screen Recorder makes it easy to add commentary, narrations, or voiceovers to your videos in perfect sync.
5. Built-In Annotation Tools

Enhance your recordings on the go with iTop’s integrated annotation features. Effortlessly add text, arrows, shapes, and highlights to create more engaging and informative content while recording.
6. Real-Time Editing Made Simple
Streamline your post-production process with real-time video editing tools. Trim, cut, or merge clips directly within the software—additional editing programs are unnecessary.
With its powerful features, intuitive interface, and unmatched performance, iTop Screen Recorder makes professional-quality video creation effortless.
Use Cases for iTop Screen Recorder:
1. Educational Tutorials
iTop Screen Recorder is a valuable tool for teachers and educators looking to create engaging tutorials and online lessons. Its annotation features and high-quality output simplify visually explaining complex concepts, making learning more accessible.
2. Professional Presentations
Effortlessly record business presentations, webinars, or training sessions with iTop Screen Recorder. Its ability to capture screen and audio ensures your message is clear and professional, helping you deliver impactful presentations every time.
3. Gaming
Gamers can record their most exciting moments with smooth, high-quality gameplay footage. Designed for minimal performance impact, iTop Screen Recorder allows you to capture your best plays without disrupting your gaming experience.
4. Content Creation
For YouTubers and social media creators, iTop Screen Recorder offers a seamless way to produce professional-grade content. Its real-time editing and annotation tools empower creators to craft polished, engaging videos easily.
Getting Started with iTop Screen Recorder:
- Download and Install: Head to iTop’s official website to download the screen recorder, then follow the installation steps.
- Set Up Your Preferences: Launch the settings and customize your recording settings to suit your needs.
- Record Your Screen: Hit the REC button to capture your screen effortlessly.
- Edit and Save Your Work: Use the built-in editing tools to refine your video, then save it in your desired format.
Pro Tips for Mastering iTop Screen Recorder:
1. Fine-Tune Video Settings for Optimal Quality
Customize your video settings to match your needs for the best recording results. For example, if you capture gameplay, set the frame rate to 90 FPS to ensure smooth, high-quality playback.
2. Boost Efficiency with Custom Hotkeys
Save time and streamline your workflow using iTop Screen Recorder’s customizable hotkeys. With a single keystroke, you can start, pause, or stop recordings—perfect for gamers and professionals who need quick, seamless control.
3. Add a Personal Touch with a Webcam Overlay
Creating tutorials or vlogs? Use the webcam overlay feature to enhance your videos with a personal connection. This tool lets you simultaneously record your screen and webcam, which is ideal for engaging and professional content.
4. Export Videos in Versatile Formats
Easily share your recordings by exporting them in various formats, including MP4, AVI, and MOV. Whether you’re uploading to YouTube or emailing your content, you can choose the format that fits your purpose.
Explore: https://megapersonals.co.com/jameliz-xxbrits/
Conclusion:
iTop Screen Recorder is a powerful, versatile, and budget-friendly solution for all your screen recording needs. Whether you’re a professional creating tutorials, an educator designing lessons, a gamer capturing unforgettable moments, or a content creator producing dynamic videos, this tool delivers. Its user-friendly interface, customizable settings, and advanced features ensure high-quality video recordings tailored to your needs.
Do You Struggle with Recording Smooth, Clear Screen Videos on Windows?
If you’re like me, you’ve probably tried more than a few screen recording tools—some crash mid-recording, others leave ugly watermarks, and many just make your system crawl. Whether you’re making video tutorials, capturing important meetings, or showing off your latest gameplay, it’s frustrating when the result doesn’t match your effort. That led me to search for a stable, smooth solution that doesn’t take a computer science degree to use.
Why I Wanted a Better Way to Record My Screen
Screen recording has become part of everyday work and personal communication. As someone who creates training videos and occasionally records webinars, I needed something reliable—no delays, no pixelated video, no complex setup. More importantly, I wanted good audio sync, high resolution, and zero lag. That’s when I found a tool that offered a good mix of simplicity and technical performance.
What Makes a Screen Recording Tool Worth Using?
There are plenty of screen capture tools out there. But only a few are lightweight, intuitive, and provide high-definition output without bogging down your system. Here’s what I believe matters most:
- Clear, high-resolution video output (up to 4K if possible)
- Easy controls that let you start recording quickly
- Options to capture system sound and mic audio together
- Minimal system resource usage
- Tools for trimming or editing right after recording
- Ability to choose full screen, app window, or a selected area
Having these features in one package helps people like me get things done faster.
Is HD Recording Enough? Here’s What You Really Need
A lot of apps claim to record in HD, but the devil is in the details. Recording in HD doesn’t matter if the frame rate stutters or if your audio goes out of sync. In my experience, a smooth 60 to 120 FPS makes tutorials and gameplay look professional. And if you’re recording meetings, clear audio capture matters just as much.
Here’s a quick breakdown of what smooth recording really involves:
| Feature | Why It Matters |
|---|---|
| High Frame Rate (60–120 FPS) | Makes motion smooth and natural |
| Resolution Options | Lets you choose between 720p, 1080p, or 4K based on what you need |
| Dual Audio Capture | Perfect sync of mic and system audio improves clarity |
| Low CPU Usage | Keeps your system responsive while recording |
Can Your Screen Recorder Keep Up with Fast-Moving Action?
If you’re into gaming or recording fast-paced demonstrations, lag can ruin everything. A good tool captures every frame without skipping and without pushing your CPU to its limits. I once recorded a live browser-based game, and my old tool dropped so many frames it looked like a slideshow. That’s why frame stability at high resolutions is essential.
Choosing What You Want to Record (And Why That Matters)
Sometimes I only want to capture one app window, not my whole screen. Or maybe just a section for a product walkthrough. Being able to choose what to record is huge:
- Full screen: Great for gameplays or tutorials
- Application window: Perfect for software training
- Custom area: Handy for product demos or UI reviews
Flexible capture settings save time during editing later.
Why Audio Clarity Is Just As Important as Video
Ever watched a video with muffled audio? Painful. Whether you’re explaining something or reacting live, poor audio kills engagement. Good screen recorders let you:
- Capture system sounds (for in-app notifications, media, etc.)
- Record your voice from the mic
- Combine both without using a separate app
- Adjust levels to avoid distortion
For example, when I record tutorials, I often speak while showing steps. Having synced audio makes the instructions easier to follow.
Real-Time Annotation: A Small Feature That Makes a Big Impact
When you’re explaining things on-screen, you don’t always want to wait until editing to add highlights or pointers. Annotation tools let you draw, circle, or add arrows while recording. It saves time and adds clarity instantly. I used it during a UX training video, and feedback from viewers was overwhelmingly positive—they found it easier to follow.
Can You Really Skip External Video Editors?
Most people assume you need Adobe Premiere or another editing tool to trim and clean up footage. But what if your screen recorder had built-in editing? Trimming, merging clips, or cutting out errors right after recording is a huge time-saver. Especially for those of us who don’t want to deal with multiple software tools.
Recording Software That Doesn’t Slow You Down
One of the most frustrating things is when your screen recorder eats up all your RAM. I’ve been there—click record, and everything else starts freezing. Lightweight recorders that use hardware acceleration or optimized encoding algorithms solve this issue. They’re especially helpful on mid-range laptops or older PCs.
Who Can Actually Benefit From These Features?
It’s not just tech YouTubers. A reliable recording setup helps so many people:
- Teachers creating remote learning content
- Students recording lectures or group calls
- Business professionals making how-to guides or training videos
- Gamers capturing fast-action gameplay
- Marketers building product walkthroughs
Some Practical Examples from My Own Use
- Recorded a 2-hour webinar without lag, file saved in MP4, crystal clear
- Captured gameplay at 1080p, 60fps, uploaded directly to YouTube with no editing needed
- Made a 3-minute software tutorial with live annotations and voiceover in one go
What Formats Should a Recorder Support?
It’s a pain when you finish recording and realize the file isn’t usable on your platform. That’s why I always check for common export formats like:
- MP4: Great for compatibility and web use
- AVI: High quality, though larger in size
- MOV: Ideal for Mac or Final Cut workflows
Being able to pick formats helps if you’re editing later or sharing files directly.
Quick Tips That Made My Recordings Instantly Better
- Use hotkeys to quickly start/pause recording without clicking around
- Adjust resolution based on your target platform (YouTube, email, internal)
- Add a webcam overlay when explaining something with your face visible
- Use noise cancellation if you’re recording in a noisy room
- Test settings first—do a 10-second test before long sessions
Frequently Asked Questions I Hear from Friends and Colleagues
What’s the best resolution for tutorial videos?
For most viewers, 1080p is ideal. It’s sharp enough for details and loads quickly online.
Can I record my voice and the system audio at the same time?
Yes, but not all tools do it well. Look for ones with dual-channel audio capture.
Does screen recording slow down my PC?
It can if the software isn’t optimized. Always check CPU usage in Task Manager when testing.